Sunday, June 1, 2025

Two Border Amish Crib Quilt

Even though this green fabric stitches harder than normal, I'm enjoying myself. I haven't quilted in a long time.

I always start at the right side and work my way left.

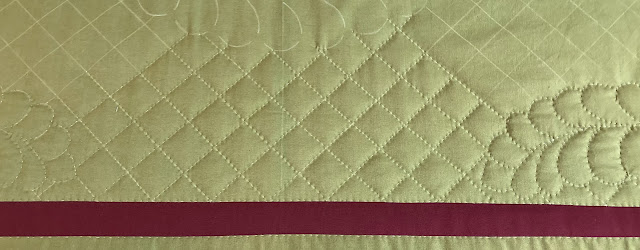
I'm reaching in farther than I would have to. In the center, the crosshatching reaches to the center design. I would rather stitch a long seam than a short one.

The quilting across this section is finished, I rolled the stick after taking the pictures. Since the outside border is already quilted, it makes the inside quilting go faster. At least it seems like that.

I do need to stitch in the ditch on both sides of the red borders. 

As I told you last week, I'm using the old sticks and stands frame because it think it holds layers better than the Grace frame does on the sides.

This is one of my favorite quilting tools, it holds the pins I use to pin the quilt to the frame. I used to keep my pins in a small plastic container but I lost the lid. I was constantly spilling the container and needed to pick up the pins all the time! This bowl is magnetic, the pins are no longer spilled. I keep my chapstick in it too. Since it's magnetic, I place it on the corner of the quilting frame and it locks onto the corner clamp.

Linking to Patchwork & Quilts, Kathys Slow Stitching Sunday, Stitching Stuff, Oh Scrap, Handmade Monday, Sew & Tell, Craftastic Monday, Design Wall Monday, Monday Musings, To Do Tuesday

Wednesday, May 28, 2025

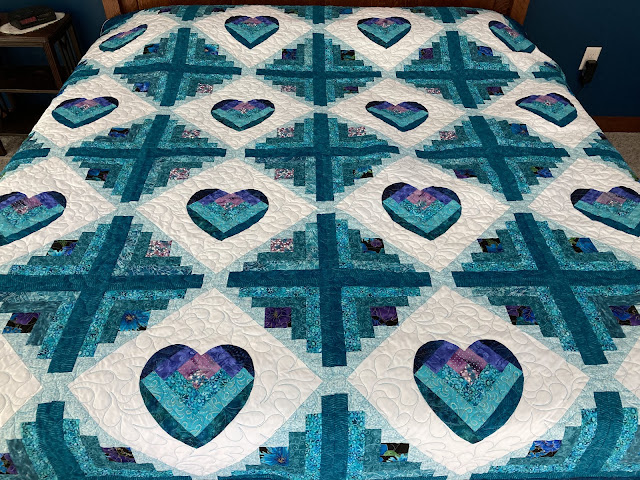
Log Cabin Hearts

In the midst of my machine quilting binge, I received a call from Calico Point, another quilt is finished, this time it's Log Cabin Hearts.

I don't know the name of this quilting design but it's very pretty. A close up of one of the blocks.

Displayed on our bed.

I haven't used a flange binding for several years but it adds a touch of color to the edge of the outside border.


You need to stitch slowly to sew the flange without sewing onto the binding section.


I used white thread on the flange. 

Log Cabin Hearts finishes at 95" square. The directions on the pattern has a very wide outside border. I didn't want that wide of a border.

The Log Cabin Hearts pattern was designed by Esther Hershberger back in 1996. It's an older pattern and has templates instead of rotary cutter instructions. I measured the templates for cutting measurements.

Linking to To Do Tuesday, Wednesday Wait Loss, May Favorite Finish!, Needle & Thread Thursday, Put Your Foot Down, TGIFF!, Finished or Not Friday, Off the Wall Friday, Beauty Pageant, Patchwork & Quilts

Sunday, May 25, 2025

Two Border Amish Crib Quilt

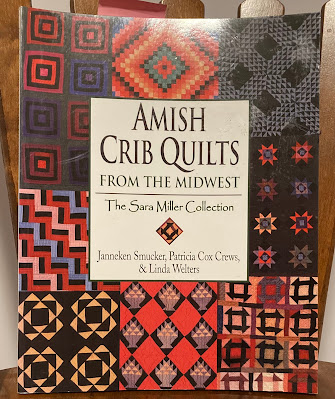
I told you I would show you my new hand stitching project today. It is number 15 on my long list of quilts for 2025. In the January post I call it the Amish crib quilt. My inspiration came from this book, Amish Crib Quilts From the Midwest, the Sara Miller Collection, page 39. This book is available on Amazon.

Several of the quilts were simple crib quilts with two narrow borders. They were titled 'plain quilts'. I'm calling mine the Two Border Amish Crib Quilt. There were no measurements or instructions given to make the quilts so I did the math. I'm sure I posted about this little quilt before but I can't find the post. 

My fabrics are a green for the main body and a medium red for the borders. The red borders are Kona fabric. The green is fabric I purchased at an Amish fabric store, I never heard of the manufacturer. 

White YLI hand quilting thread is being used instead of black thread. I did stitch several inches with black but didn't like so I removed it. The outside border is a chain of feathers.

The first long side border is quilted.


I'm stitching in the ditch along the sides of the narrow borders next to the outside border. I'm using 4 needles so I can quilt all four edges as I go. For me, this is easier than quilting one edge all the way then going back and quilting the next edge.


I used a white Sewline marking pencil to mark the designs through the stencils. The marks will wash out after the quilting is finish. I like how it makes a narrow line and it doesn't rub off like a chalk pencil does. In my opinion, chalk pencils are worthless, you can't sharpen them without the chalk breaking.


See how the outside edge of the fabric is sticking up? I don't like that.


Now I've stitched the fabric edge down flat. When the quilting is finished and I'm ready to trim the edge, it will be easier because that edge is flat.


The four borders around the quilt are quilted then I rolled the two long sides in and I'm ready to start quilting the inside. The markings don't show in this picture but they're there! The inside looks a little loose but it will quilt out just fine. Sorry about my shadow, I was trying to get most of the quilt in the picture.


It is going to be challenging to take true color pictures of this green fabric, it really is prettier than it looks. When it's completely finished, I'll take a picture outside and you will see the true color.

I'm using the stick and stand frame because I think the tension is better than the Grace Frame.


Here is a link to a post about putting a quilt into this frame. I tried to be detailed. Hopefully it will answer any questions you have.

Wednesday, May 21, 2025

Two Compassion Qults

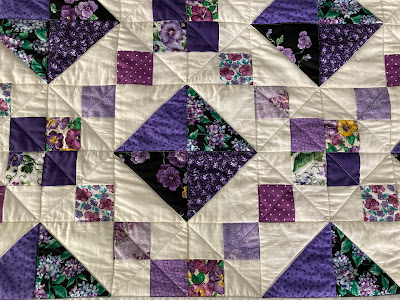
This week I have two compassion quilts to show you. The first little quilt finishes at 41" by 50". The blocks were leftovers from a quilt I pieced probably 20 years ago, time to move them out. I posted about the flimsy last November.

As usual I did simple machine quilting. 


Using white thread I quilted through the purple chain then stitched in the ditch along the edge of the HST blocks. It still needed more quilting so I horizontally and vertically along the seam line every 4" which went through the center of the HST block.


The white border has quilting on both sides. 

I did mark a design in the border with a disappearing pink marker but I couldn't see it so I just kind of did my own thing. The border fabric is so pretty though, hopefully it will cover my poor quilting design. 

Years ago I had pieced two simple quilt tops to spiral quilt and donate. I quilted one and thought that was enough spiral quilting. The other quilt top was the perfect size for the back of this quilt.


Maybe they'll decide they like the backing fabric better and use it as the top side.

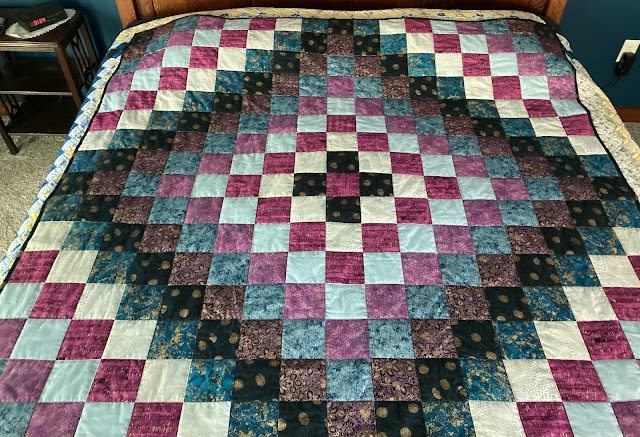
The second quilt was a store kit I bought at Caroline's last July and pieced in October.


The kit is named Trip Around the Cottage, a play on Caroline's Cottage Cottons. The flimsy measures 67.5" square.

I liked the touches of gold in the fabric so I pulled this thread to use for the quilting. This quilt has easy quilting, I stitched in the ditch on the side of all the seams. This was enough quilting so I called it finished.


I challenged myself to not buy backing fabric for these small quilts, I had these fabrics in the stash so that's what I used.

I did prewash the red fabric (which is more maroon then red), it bled a lot but the excess dye finally left.

Sunday, May 18, 2025

Elegant Garden, Block 24, the Last Applique Block!

Block 24 of the Elegant Garden quilt is completed, the applique blocks are finished!

I went ahead and pieced the center block so the center of this quilt is completed.

The row that was intended to be the bottom row (row 5) was switched with row 4 because the center block of row 4 had the same background fabric as what was used in the center star block. Switching the rows was an easy solution, but I did have a problem with the pieced center block.

This is the block trimmed to size. I don't know what I did but this isn't right!

Time for plan B, the block was trimmed smaller then sashing was added. Now it's the size it's supposed to be and it was sewn into the center row.

The next step was to piece the 24 half star blocks to go around the outside of the quilt. I don't think so, not after having a problem with the center star block.

Now the decision is, someday, will I regret not piecing those star blocks? That's an easy answer, NO! I was attracted to this quilt because of the applique, not the stars. Besides, if I made those half star blocks, I would need to buy more pink fabric.

I used to have more  pink civil war fabrics but back in 2022, I pieced a flimsy I named Churn Dash Diva.

In the civil war tub were leftover fabrics from that quilt, the dark brown fabric and the pink striped fabric that were used for borders in Churn Dash Diva. I had enough of the brown fabric for an inside border and an outside border for Elegant Garden. There was also enough pink striped fabric for a wider border. And, there is fabric in the tub that should work well for the binding. I always sew binding immediately after finishing the flimsy.

My Elegant Garden flimsy measures 60.5".

It was rather fun to make a small quilt for once. For now she's going into the 'to be quilted' closet and hang along side her older sister churn dash diva. And, in case you're wondering, churn dash diva is still waiting to be hand-quilted.

Every fabric used in Elegant Garden came from the civil war tub, no fabric was purchased for the purpose of making this quilt. The tub is in complete disarray but is still pretty full. There are some larger pieces in the tub that will be used as backing fabrics. Maybe I'll sew a pieced backing for churn dash diva too, I wonder what she'll think about that?

I hadn't planned to have a finished flimsy to show you today but sometimes quilting goes like that. I have started a new project that I will show you next week.

Linking to Patchwork & Quilts, Kathys Slow Stitching Sunday, Stitching Stuff, Oh Scrap, Handmade Monday, Sew & Tell, Craftastic Monday, Design Wall Monday, Monday Musings, To Do Tuesday

Wednesday, May 14, 2025

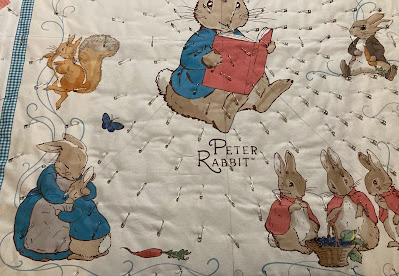
Quilting the Peter Rabbit Quilt

I have several smaller flimsies I've pieced in the last year that I'm going to quilt with my home sewing machine. This works well with spring work outside, I can quilt awhile then go outside into the sunshine, play in the soil and admire all the flowers and green grass. Some of these little quilts I will keep, some are designated for other people and some are compassion quilts. That is what my Wednesday posts will be about for the rest of May, maybe even into June until all the little quilts are finished.

In January I pieced the kit I purchased at Caroline's last summer during my birthday outing. I call it the Peter Rabbit quilt, the kit name is Book Adventures.

I've started a month of machine quilting all the small quilts I've made this last year. Most of them are compassion quilts but this quilt is staying with me until I find the right child, someone who loves to read books.

Last year I experimented with spray glueing regular batting, I also tried a glue batting that you pressed and it stuck to the backing and quilt top.

This year I stuck with the basics, pining only. I pin closely while watching a program on my ipad and time passes quickly. 


Something else I do that might be different from the normal is I don't have a lot of backing on the sides of the quilt. I understand why long arm quilters do but I don't find it necessary to have excess fabric on the sides.


For the quilting I used X and + quilting design. I marked a diagonal X on the quilt flimsy from corner to corner then marked a + at the center of the quilt horizontally and vertically. You sew on the diagonal and pivot on the center lines. I use a Frixon pen for marking, which is easily removed with a hot iron after the quilting is finished.

I used a lightweight poly batting because I don't like poofy quilts. Cream colored cotton thread was used for quilting.

I quilted a quarter of the quilt each day and I started with one of the sides because there is more quilting on the sides.


Here is a closeup of the quilting.


Day two of quilting. The opposite side was quilted. I don't know if it really makes a difference if the top or bottom was quilted after the first side. This just how I do it.


Day three, this time the top section.

Day four, the finish!

After the X quilting was finished, I stitched in the ditch around the neutral border between the book border and the outside border on both sides. See the blue gingham border, I also stitched in the ditch on both sides of it even though it was printed onto the fabric, not pieced. I just thought that would look nice.

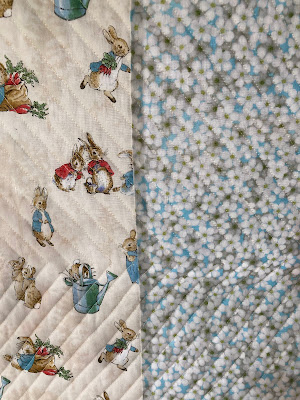
Backing fabric did not come with the kit. One day when I was at Calico Point I saw they had a bolt that coordinated with these fabrics so I purchased two yards. Of course that wasn't enough so I added this nice floral because rabbits like flowers. It has been in the stash for a long long time.


Sorry, forgot to crop this photo, you have a nice shot of the emerging hostas. 

Obviously this quilt is directional and I even managed to have the backing fabric running the same direction as the front!

Of course I have to have a picture on the glider. 

The quilt has not been washed so it will probably shrink slightly after laundering. As of now it measures 59" by 66.5" I have no idea who this quilt will be gifted to, probably a child who likes to read. The kit even came with the Peter Rabbit book!

I don't know if the kit is still available, I'll let you google it.

I'll be honest, I don't really think the side border blocks look like books but it's a nice idea.

I'll admit the quilting lines aren't perfectly straight, the measurement between the lines aren't a perfect 1/2" but . . . there are no tucks or pleats on the front or the back and it's a FINISH!

Peter Rabbit Quilt or Book Adventures was #17 on my list of 2025 quilts to make.

Linking to To Do Tuesday, Wednesday Wait Loss, Needle & Thread Thursday, Put Your Foot Down, Free Motion Mavericks, TGIFF!, Finished or Not Friday, Off the Wall Friday, Beauty Pageant, Patchwork & Quilts

Sunday, May 11, 2025

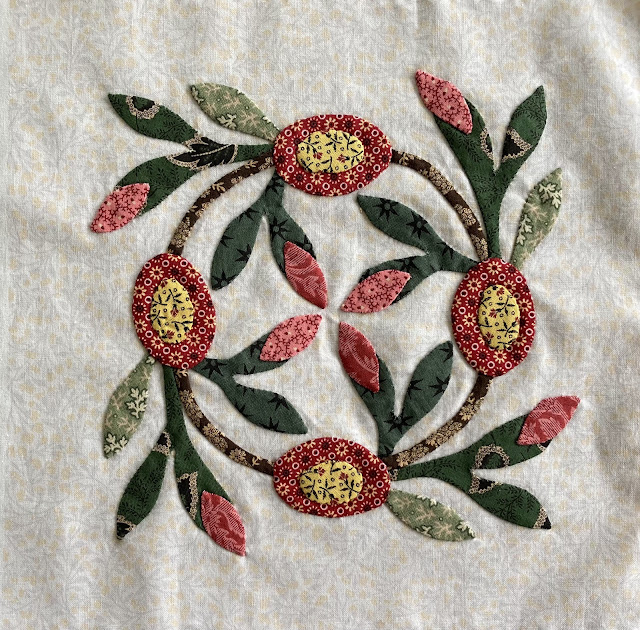
Elegant Garden, Block 23

Block 23 is finished. This block seems so bright and cheery with the pinks and ovals of yellow.


Just one more block to applique then they'll all be completed!

Elegant Garden is designed by Edyta Sitar.

Linking to Patchwork & Quilts, Kathy's Slow Stitching Sunday, Stitching Stuff, Oh Scrap, Handmade Monday, Sew & Tell, Craftastic Monday, Design Wall Monday, Monday Musings, To Do Tuesday